Sliding closet doors can be functional and aesthetic elements in any room, but sometimes they must be removed. Whether you’re renovating your space, replacing worn-out doors, or simply looking to create a more open layout, knowing how to remove sliding closet doors is essential. Read on as we walk you through the entire process, ensuring you can handle the task efficiently and safely. From gathering the necessary tools to tackling common challenges, we’ll cover everything you need to know about how to remove sliding closet doors.
Steve Daria and Joleigh, experienced real estate investors, often emphasize the importance of mastering simple home improvement tasks like removing sliding closet doors. According to them, this skill not only adds to the flexibility of room layouts but also enhances property appeal during showings. Follow their advice and use this guide to efficiently remove sliding closet doors, ensuring you can tackle this common project with confidence.
Why Remove Sliding Closet Doors?
Before discussing the steps on how to remove sliding closet doors, it’s essential to understand the benefits of removing them.
Enhancing Aesthetics and Functionality
Sliding closet doors can make a room look dated.
Removing them allows for a more contemporary look, with the potential to create a more open and accessible space.
Imagine walking into a bedroom where you can see all your clothes at a glance without dealing with the hassle of sliding doors that get stuck.

Increasing Property Value
Homes with modern, functional spaces appeal to buyers.
Getting sliding closet doors and replacing them with more up-to-date options can significantly increase your property’s value.
Possible buyers are more likely to appreciate the ease of use and modern appeal of hinged or bi-fold doors.
Addressing Maintenance Issues
Sliding closet doors often come with maintenance issues, such as misaligned tracks or worn-out rollers.
By removing these doors, you eliminate the need for constant repairs and create a more reliable storage solution.
This is particularly advantageous for real estate investors who want to minimize maintenance costs.
Get An Offer Today, Sell In A Matter Of Days…
Tools and Materials You’ll Need
Here are the tools and materials needed to remove your sliding closet doors.
Essential Tools
Before you start, collect the necessary tools to ensure a smooth process.
Here’s what you’ll need:
- Screwdriver (Phillips and flathead)
- Hammer
- Pry bar
- Utility knife
- Tape measure
- Level
Safety Gear
Safety should always be a priority. Equip yourself with the following safety gear:
- Safety glasses
- Gloves
- Dust mask
Materials
Having the right materials on hand can make the project easier. Consider the following:
- Wood putty
- Sandpaper
- Paint or finish
Preparing Your Workspace
Preparing your workspace is an essential step to safely remove your sliding closet doors.
Clearing the Area
Start by removing any items from the closet and surrounding area.
This will give you ample space to work and prevent any damage to your belongings.
Ensure you have a clear path for moving the doors once they’re removed.
Protecting the Floor
Sliding closet doors can be heavy and may scratch the floor during removal.
Lay down a protective covering, such as a drop cloth or cardboard, to safeguard your flooring from damage.
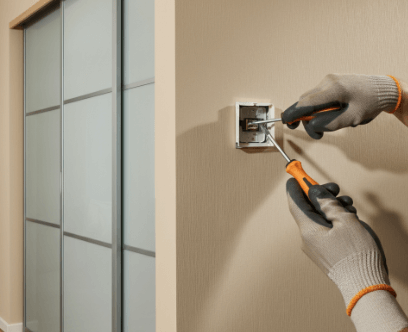
Disconnecting Power
If there are any electrical components near the closet doors, disconnect the power to avoid accidents.
This is crucial for ensuring your safety during the removal process.

Step-by-Step Guide on How to Remove Sliding Closet Doors
Here’s how to remove sliding closet doors safely:
Step 1: Remove Door Stops
Most sliding closet doors have door stops on the top track to prevent the doors from sliding out.
Locate these stops and use a screwdriver to remove them.
Keep the screws and stops in a safe place, as you may need them later if you plan to reinstall the doors.
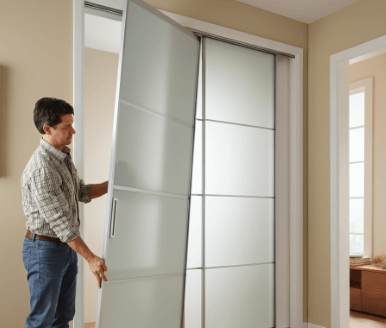
Step 2: Lift the Doors Off the Track
With the door stops removed, you can now lift the doors off the track.
Start with the outermost door. Lift it gently and angle the bottom towards you until the door is free from the bottom track.
Carefully lower the door and set it aside. Repeat this process for the inner door.
Step 3: Remove the Tracks
Next, remove the top and bottom tracks. Use a screwdriver or drill to get the screws holding the tracks in place.
Once the screws are removed, slowly pry the tracks away from the wall and floor using a pry bar. Be careful not to damage the wall or floor during this step.
Dealing with Common Issues
Here are the common issues when removing sliding closet doors and how to deal with them:
Stuck Doors
If the doors are stuck and won’t come off the track easily, don’t force them.
Check for any obstructions in the track and remove them.
If the tracks are damaged, you may need to cut them with a utility knife to free the doors.
Damaged Tracks
Damaged tracks can make removing sliding closet doors more challenging.
Use a hammer and pry bar to cautiously remove bent or damaged sections.
If the damage is wide, consider replacing the tracks entirely.
Misaligned Doors
Misaligned doors can be tricky to remove.
Adjust the door rollers using a screwdriver to align the doors properly before attempting to lift them off the track.
What to Do After Removing Sliding Closet Doors
Here’s what you need to do after removing the sliding closet doors:
Patching Holes
Once the doors and tracks are removed, you’ll likely have holes where the screws were.
Use wood putty to fill these holes. Set the putty to dry, then sand it smooth.
This will create a clean surface for any future installations.
Painting or Staining
To complete the look, consider painting or staining the area where the tracks were removed.
This will give your space a polished, finished appearance and help blend the area with the rest of the room.
Installing New Doors
If you’re planning to install new doors, measure the opening carefully to guarantee a proper fit.
Consider options like bi-fold doors, French doors, or even curtains for a modern touch.
Follow the manufacturer’s instructions for installation to ensure a secure and functional setup.
Tips for a Successful Project
Explore these essential tips for a successful project.
Take Your Time
Rushing through the removal method can lead to mistakes and potential damage.
Take your time and follow each step carefully to ensure a successful outcome.
Get Help
Sliding closet doors can be heavy and cumbersome to handle alone.
Enlist the help of a friend or family member to make the procedure easier and safer.
Having an extra set of hands can also help prevent accidents.
Keep It Organized
Keep all screws, stops, and other hardware organized throughout the removal process.
This will make reinstallation or disposal easier and prevent lost parts.
Conclusion
Removing sliding closet doors can transform your space, making it more modern and accessible. By following this ultimate guide on how to remove sliding closet doors, you can remove sliding closet doors safely and efficiently. Remember to take your time, stay organized, and prioritize safety throughout the process.
**NOTICE: Please note that the content presented in this post is intended solely for informational and educational purposes. It should not be construed as legal or financial advice or relied upon as a replacement for consultation with a qualified attorney or CPA. For specific guidance on legal or financial matters, readers are encouraged to seek professional assistance from an attorney, CPA, or other appropriate professional regarding the subject matter.

